Onboard REALTIME Telemetry Cockpit Display | DJI FPV RC Freewing Avanti EDF JET | FIRST FLIGHT !
We have been a long time fan of the Freewing 80mm EDF Avanti as an aerobatic sport jet and it was about time we converted it to head tracked DJI FPV. We have designed our own smooth moving pan/tilt mechanism with a bearing and two servos that moves as the pilot on the ground moves his head. We use the FatShark External Head Tracker module but are also close to having our own ‘Essential RC’ head tracker. The flight footage is from 2 flights one of which was flying with Jason 8S powered Avanti which was difficult to keep up with. In future we’ll have the same setup so can fly closer !
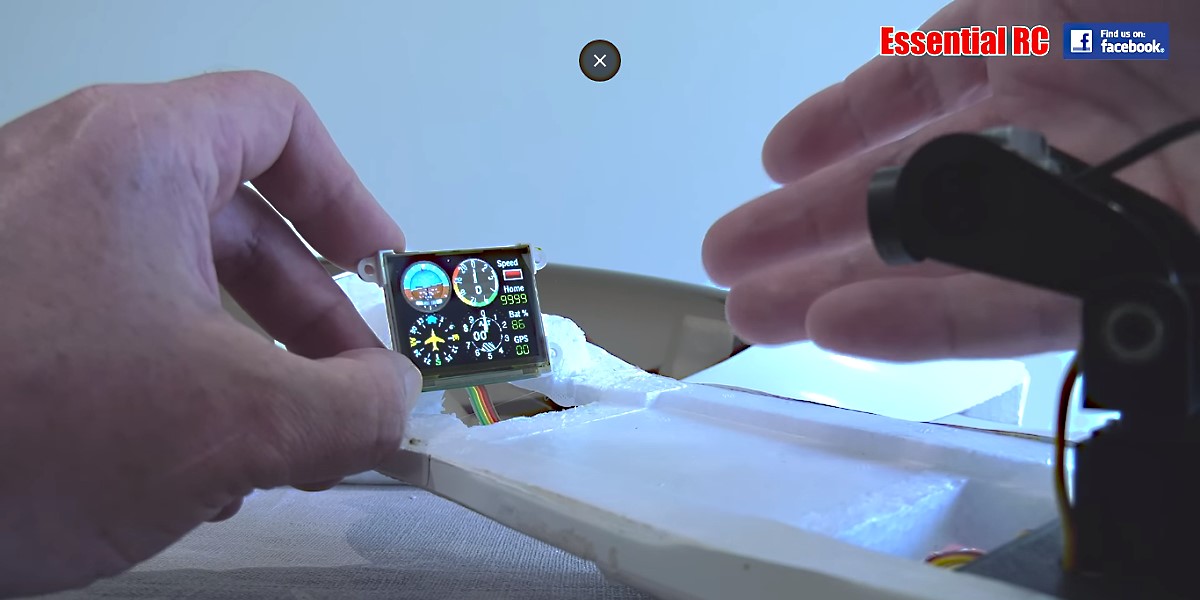
In this video we also tested out the RCGauges realtime telemetry display. It is available in either standalone or iNav versions. We purchased and tried out the standalone 2 inch version. Although functionally it works very well it is not viewable in the bright sunny conditions when we flew, much like any other LED display. We’ll be using this LED display again when its not so bright on cloudy days or in the late afternoon. We will also try it in other projects especially in cockpits that can provide a lot more shade. Look on www.RCGauges.com for more information.
Note that to reduce the unfortunate flicker effect with the DJI FPV camera a Caddx 14MM ND8 filter should be used. This happens because of the mismatch in frame rate/frequency between the camera (60 fps) and the OLED (90 hertz). An ND filter on the camera forces the automatic shutter speed to be longer duration and this prevents most of the flickering. For the DJI FPV camera to have best focus the LED display needs to be 10cm to 12cm away. Ensure this can be accommodated in your cockpit layout. If not, then consider the smaller LED display sold by RCGauges.COM